A tutorial, a contest and a whole lot of quilting pictures!

Friday, August 28, 2009

O.K. I've got lots to post about today, but first I want to remind you that you have just over a week to get as many quilts labeled before my giveaway. You'll get the same amount of entries into my contest for each label you make and post about. I'm going to give the winner some fabric (probably some fat quarters or charm packs, not sure what yet, but if you win you will get to tell me what style of fabric your little heart is desiring and I will surprise you with a little somethin' special!) The rest of the details about the contest (& where to leave your comments to enter) are here.

So, some of you may be wondering how do I make a label? I've talked about it a couple of times before (and it's not too hard to figure out) but now I've got a couple of pictures to help you see what to do. Call it a tutorial, if you will, but it's quite easy I tell you.

First, pick a font on your computer that is kind of simple and will be easy to embroider. Print out the information you want to be on your label. It's nice to include who or what the quilt was made for, who made it, the year it was made, the city & state you're from (think about what info. someone generations down the road might like to know if they accidentally stumbled across your quilt and wanted to know the history of it.) See, like this:

I printed out the next 3 labels I want to make all on one paper.
Next, you will want to use a light box or tape your paper up to a window (which is what I have to do.)


Using a water soluble fabric marker, trace the words onto your fabric.

Then put your fabric into an embroidery hoop and trace over your words with two strands of embroidery floss using a simple stitch. I like the back stitch. Like so:

After you've embroidered all of the words take the fabric out of the embroidery hoop and cut down your fabric 1/4" bigger on each side than the desired finished size of your label. Make a template out of freezer paper (I used thin cardboard in this instance) that is the finished size of your label. Iron over the edges of your fabric onto the template (using a little starch) to make nice, crisp edges.


Take the template out and there you go! You've got a handmade label.

Stitch the label onto your quilt using a hidden stitch and You. Are. Done. See? Not a big deal.

Now, speaking of that label. I've got a few pictures I want to share. Remember this mystery quilt? Well, we've given it to it's special recipient. Any guesses who it could be for? That's right! Gigi. My grandma (who taught me how to quilt). We gave it to her at our family reunion last week and here are some pictures:

My cute SIL, Brittany, gives all the great details and tells what my grandma said about the quilt after we gave it to her over on her blog, so you can click here if you want to read about those things, see more pictures, and find out how we worked out the details of doing this fun family project together.

Before we gave the quilt to my grandma though, we did a quick little quilt show showing some finished products from our Americana family quilt block exchange we had a couple of years ago. That is me with my quilt on the left and my grandma with her quilt on the right. Oh, man. I was so sad after seeing my grandma's version because it was a million times better than mine. I just didn't put the time and energy into coming up with something cute for it and now I really regret it. I love her dark blue sashing and light blue posts and borders. Her sawtooth border is fabulous too. Then to top it all off she did custom quilting on hers and it is just beautiful now. I really wish I would have put the extra time and money into making it cute. Oh, well. Live and learn.

My mom is almost done with her quilt top and here is a picture of hers. Looking good mom!

It's fun to have quilting stories involving 3 generations of family members. What good memories!

Fresh Watermelon

Thursday, August 27, 2009

THIS:

PLUS THIS:

EQUALS A FINISHED THIS:The pattern for the main body of this quilt is by Black Mountain Quilts.
The border was designed by a friend, Lori Neubert. Of course our quilts are a little different from each other though. Lori did a tan border with white daises, no stop border, a straight edge at the bottom and all of her lettering went across in one curvy line. It was so cute! I wish she had a blog - her quilts are AMAZING!!! This was such a fun quilt to make! Working on this quilt has taught me that my quilts tend to be a little prude and I need to have more fun with my creations in the future!

Kayleen Parry in Lehi, UT did the quilting on this and I am so pleased. She did a wonderful job. I even love the yellow daises, which I was nervous about. Too many colors of threads! Agh! Crazy! She used red on the log cabin blocks, yellow on the black stop border and cream on the bottom border. But, it all turned out fabulous. And she gives you 10% off with your first order :)

All of the applique was done using Heat 'n Bond and a tiny zig zag stitch. Yeah. I know. I consider myself a professional zig - zager now.

Heart Block #2

Monday, August 24, 2009

which is part of this project.

I've been away

with all of these people:

Let me specify. They're not just any people - they're my extended family on my mom's side!

I've been doing a little of this:


and a little of that:

(O.K. Let's just say that I was shaking out of my boots up there.)

Whew! I'm almost down!

Bulls-eye Quilt & a Sugie Cookers contest!!!

Thursday, August 6, 2009

You may have seen this picture before, under my 24-hour project post, but I really didn't focus much on the quilt I made for B's bed. I took a few more pictures of the details of B's quilt and wanted to post them in my finished product list. Here's the quilt. It's a raw-edge applique quilt in a bulls-eye pattern. It's very fun and very easy ~ a good one for beginners!

B picked out his backing ~ the black and gold star fabric peeking out under there.

I used up some left overs from the quilt and did a scrappy binding. I love left overs!

Here is the label:

For my labels I like to find a cute font from my computer and print out my name, city and state, and the year I completed it. If it's a gift then I also like to state who it's for. Then, I trace the letters onto my chosen fabric (muslin works nice) with a water soluble marker. Then I embroider over the letters using a simple back stitch. It clear to read and I feel like it's there to stay. In the past I've sewn the label on after the quilt is quilted, but I've heard it's nice to have it sewn on before it's quilted so that it can't ever be removed. If you don't want to spend the time to embroider then you can use a fabric marker too. I just like the look of the embroidery.

Here's another one:

and another:

This one was embroidered directly onto the quilt back, which I kind of liked.


So I was looking around and realized that although I had good intentions, I really don't have a lot of labels on my quilts. So, I've inspired myself to go back and put some labels on some of my finished projects. So here's where the contest comes in. For those of you that are with me on this quilting thing, I challenge you to a label making contest! I'm kind of embarrassed to do this because I know I don't have that many people who read my blog. And I know that of those of you who do, there are just a few that actually quilt. But, we'll just try this and see what happens. Here are the guidelines:

*You can only enter finished labels that have been made and sewn on to your quilts between August 6th and September 6th. (The quilts can have been completed prior to these dates, but only count labels that were made during this time period. You can even count the labels you sew on finished quilt tops that aren't quilted yet.) Sometime before midnight on Sunday, September 6th, leave me a comment telling me how many labels you completed during the month. You have to post pictures of your finished labels, so leave me a link to your blog, o.k.?

* The labels can be made with embroidery, marker, ink jet printers - whatever. Just do what suits you!

** You'll get one entry into my contest for each completed label.

* Contest ends at midnight on Sunday, September 6th - 1 month from now!

* I'll announce the winner sometime on Monday, September 7th.

* The prize ?!? will be some fabric. The winner can tell me what kind of style of fabric they want (i.e. Modern, 40's, Traditional, Christmas, etc.) and I'll surprise you with a little something that I think you will LOVE!

Labels help to tell the story of our quilts and our lives to future generations. I like this quote from the book Remember Me by Linda Otto Lipsett, "It is not a woman's desire to be forgotten...And thus she signed her name in cloth." So go on and get busy making labels! No more mysterious quilts floating around o.k.?

July - a good month

Tuesday, August 4, 2009

Beware:
This post is kind of long and full of lots of "apparently's".

July was full of lots of fun family activities.

#1 - A little fishing at a nearby lake (pond? Not sure what it is.)
Key word = blazing hot sun.
Not sure why the dock across the lake under some trees wouldn't have worked, but oh well. it was fun.

#2 - Camping with friends in American Fork Canyon.

Did you know that Utah is Bear Country?
How is a girl suppose to get any sleep with that kind of thought running through her head all night long? I have heard about recent sitings about bears near campsites lately and could not forget about the terrible bear attack that happened a couple of years ago (in AMERICAN FORK CANYON) that took the life of a young boy, so needless to say I was very nervous all night. It didn't help that there were signs everywhere about safety. Apparently, a fed bear is a dead bear...

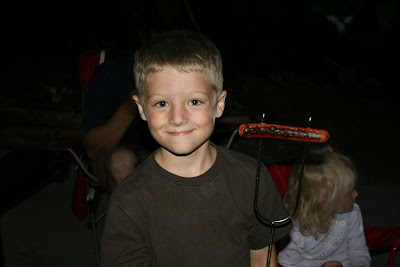
Gotta get that marshmallow scent cleaned off (as to not attract any little cubs...)

umm, yumm...that's the way to do it, B!

How could I sleep peaceably with all of these cuties under our care?

O.K. So apparently, this is not the first time that my baby has used a pocket knife to carve wood!?! What the heck? I guess this is what happens when he goes on Scout camp outs with dad. Not good. Not good at all. Look, he's a pro!


#3 - Aside from camping,
A little girl turned FOUR.
We kept the day pretty simple with a trip to the pool
(thus the red cheeks. I really did put sunscreen on my kids!)

Among a few gifts, she received a new barbie bike

and a new pink kitty from daddy.

#4 -
A boy
got a hair cut from daddy.

Dad did a pretty good job, eh?

Oh, and we can't forget the awesome Kool-aid stand that we had where the kids raked in an amazing $18.60. Nice. Since then, I have not passed a single child selling Kool-aid. Haven't pulled the "pretend I don't see 'em" strategy (which I have to admit I have done a few times in the past, but apparently that is NOT o.k. to do.) I have changed my ways though...


Although we've been having lots of fun around here, I'm starting to get ready for school to start... What about you? It's just around the corner you know? :)